Waxing is one of the important car care routines that can keep your car’s paintwork looking flawless. In addition to providing extra protection, waxing your car can also improve its shine. Do-it-yourselfers enjoy the satisfaction of completing it themselves, even though many car owners prefer to leave the job to the experts. Still, you need the right equipment to achieve professional results at home.
Using the right tools is crucial
Using DIY car wax requires the right equipment for a number of reasons. Firstly, it ensures that the wax is evenly distributed, avoiding streaks and stains. Second, having the right equipment can speed up the process and save time and effort. Last but not least, high-quality instruments help to achieve superior work and protect your car’s paint from dents and scratches.
Precautions for car wax tools
Here are a few things to consider when choosing your own vehicle washing tools:
Material quality
Choose high-quality materials for your tools, such as foam or microfiber; they cover more and are paint friendly.
Easy to use
If you have never waxed a car before, choose tools that are easy to operate and move.
Relationship with washing type
Whether you use paste, liquid or spray wax, make sure the equipment you choose works with it.
Popular tools for DIY car washing
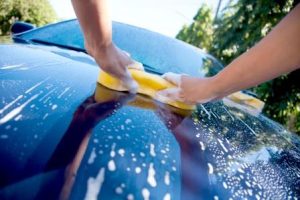
Foam pads for applicators Foam pads can be used with different types of wax. They are kind to painted surfaces and provide even coverage.
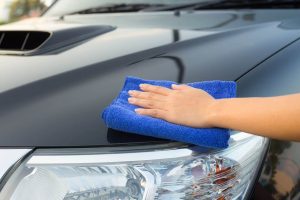
Towels made from microfibers work wonders for polishing and removing excess wax. Soft texture prevents swirls and scratches.
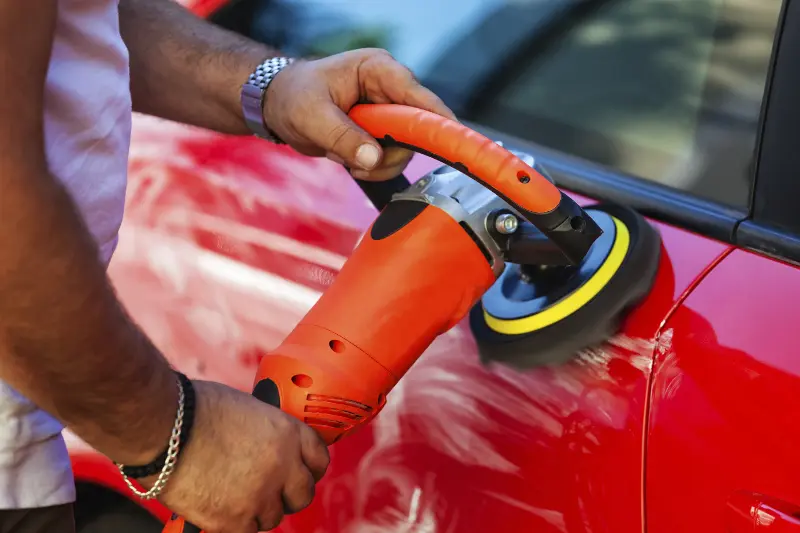
Dual-action polishers: Dual-action polishers are perfect for hobbyists who want the same results as professionals. In addition to waxing, it also polishes the paint surface, eliminating imperfections and improving shine.
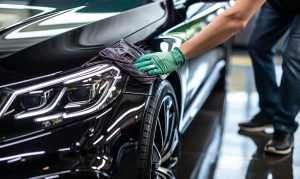
Use a wax sponge to easily apply wax to hard-to-reach areas, such as around moldings or dishes.
Although more complex, rotary polishers are very effective at waxing and repairing paint defects. However, making good use of it requires some talent.
Rewards for each instrument
Foam applicator pads in particular provide streak-free coverage.
Microfiber cloths absorb excess wax and provide a smooth surface.
Dual-action polishers combine waxing and polishing, saving time and effort.
For precise application, a washing sponge is very useful.
The results of a rotary polisher look professional, but require expertise and care.
Instructions for use of each instrument Reliability
To remove dirt and debris from your car, start by washing and drying it thoroughly.
Sprinkle a small amount of wax onto the chosen applicator.
Break it into small pieces and apply the wax in circular motions.
To make the wax shine, use a microfiber cloth and press gently.
Repeat the above steps until the car is completely waxed and polished.
Safety tips for DIY waxing
To prevent premature drying of the wax, you should work in a cool place.
Extreme temperatures should not be used to wax your car as this can disrupt the waxing process.
Applying wax with gentle pressure prevents scratches on the paint.
Refer to the manufacturer’s instructions for each instrument and wax product.
To summarize
Applying DIY car wax is a satisfying activity that preserves your car’s appearance and protects your car’s paint. With the right equipment and methods, you can achieve professional-quality results at home.
Professional Q&A
Can I use common household items such as towels or sponges to wax my car?
A: Although you can use regular materials, the best results are achieved with professional equipment such as foam applicator pads and microfiber cloths.
How often should I wax my car?
A: Although driving habits and weather conditions vary, waxing your car every two to three months will keep it shiny and protected.
Under what conditions with direct sunlight can a car be waxed?
A: It is best to avoid waxing your car outdoors as the heat can dry out the wax too quickly and make it difficult to polish.
Does my car need to be washed before I wax it?
Your car should be washed before waxing to remove dirt and grime that can hinder the waxing process.