Imagine driving down the road with your car shining like it just rolled off the showroom floor. That glossy finish not only turns heads but also protects your vehicle from the elements. While there are countless commercial waxes available, have you ever thought about making your own? DIY car wax offers a blend of cost-effectiveness and customization that store-bought options simply can’t match. Plus, it’s a fun project that can give you a sense of accomplishment! Let’s dive into why DIY car wax might be right for you, what you’ll need to get started, and how to make and apply it effectively. Your ride deserves some extra love—let’s get crafting!
Why Use DIY Car Wax?
Choosing DIY car wax means embracing creativity while caring for your vehicle. It allows you to control the ingredients, ensuring they are safe and effective. Many commercial products contain harsh chemicals that could potentially harm your car’s finish over time.
Another reason to consider DIY is cost savings. Store-bought waxes can be pricey, especially if you have a larger vehicle or wax it frequently. Making your own can significantly reduce those expenses, giving you more money for other upgrades.
Plus, crafting your own wax offers a personal touch. You can experiment with different recipes until you find one that works best for your preferences and needs. This level of customization ensures you’re applying a product tailored specifically for your ride.
Making car wax at home not only protects and enhances the appearance of your vehicle but also adds an enjoyable hands-on experience to car maintenance.
What You Will Need for DIY Car Wax
Creating your own car wax can be both fun and rewarding. To get started, gather a few essential ingredients.
First, you will need beeswax. This natural ingredient provides the base for your wax, giving it that protective quality.
Next up is carnauba wax. Known as the “queen of waxes,” it adds a brilliant shine while enhancing durability.
Don’t forget about coconut oil or olive oil—these oils help to create a smooth application and keep the mixture pliable.
You’ll also need some basic utensils: a double boiler for melting, measuring cups for accuracy, and containers to store your finished product.
Grab some microfiber cloths for easy application and buffing once you’re ready to apply your homemade creation on your vehicle’s surface. Having all these materials at hand makes the process seamless.
Step-by-Step Guide to Making Your Own Car Wax
Making your own car wax is simple and rewarding. Start with a clean workspace to keep everything organized.
Gather the ingredients: beeswax, carnauba wax, and some coconut oil. These natural components will give you a glossy finish while protecting your paint job.
Begin by melting the beeswax and carnauba wax together in a double boiler over low heat. This prevents burning. Stir gently until fully liquefied.
Once melted, remove from heat and add coconut oil for flexibility. Mix thoroughly to ensure an even consistency.
Pour the mixture into small containers or jars while still warm but not hot enough to burn your skin. Allow it to cool completely before sealing.
Now you have homemade car wax ready for application!
Benefits of Using DIY Car Wax
Creating your own car wax comes with a range of benefits that can enhance both your vehicle’s appearance and your experience as an owner.
First, DIY car wax allows you to take full control over the ingredients. You can choose natural and eco-friendly components, ensuring that you’re not harming the environment or exposing yourself to harsh chemicals.
Cost-effectiveness is another major advantage. Store-bought waxes can be pricey, but making it at home often requires just a few common items found in most households.
Additionally, homemade wax tends to offer unique protective qualities tailored specifically for your needs. You might find combinations that work better for local weather conditions or specific paint types.
Applying DIY wax gives you a sense of accomplishment and pride in caring for your vehicle. It’s a rewarding process that strengthens the bond between you and your ride while keeping it looking sharp on the road.
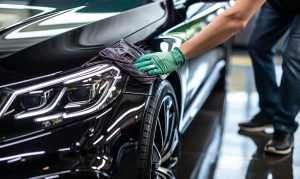
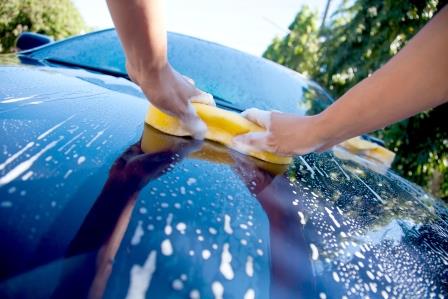
Tips and Tricks for Applying DIY Car Wax
When applying DIY car wax, start in a shaded area. Direct sunlight can cause the wax to dry too quickly, making it harder to buff out.
Use a clean microfiber cloth for application. This will prevent scratches and ensure an even distribution of wax on your vehicle’s surface.
Work section by section. Apply the wax using circular motions for better adhesion and coverage. It’s also helpful to follow up with straight strokes for a polished finish.
Let the wax cure as per its recommended time before buffing it off. A little patience goes a long way in achieving that glossy shine you desire.
Don’t apply too much product at once; less is often more when it comes to waxing your car. This not only saves materials but also makes buffing easier afterward.
Always keep your tools clean after use; this ensures optimal performance during your next waxing session.
Alternative Uses for DIY Car Wax
DIY car wax isn’t just for your vehicle’s shine. Its protective properties can be handy around the house too.
Use it to repel dust on surfaces like furniture or electronics. A light application can create a barrier, making cleaning easier and less frequent.
You might also find it useful for snow removal in winter months. Rubbing a bit of car wax on your shovel or windshield wipers helps prevent ice from sticking.
Have squeaky drawers? A dab of DIY car wax can lubricate them smoothly, allowing easy opening without that annoying creak.
For those with outdoor furniture, applying some DIY car wax protects against UV rays and weathering, keeping your pieces looking fresh longer.
Even woodworking enthusiasts appreciate its ability to enhance wood finishes while providing extra protection against moisture damage. There are endless possibilities waiting to be discovered!
Conclusion
Making your own car wax can be a rewarding experience. It not only saves you money, but it also allows you to customize the formula to suit your needs. By following the steps outlined and using quality ingredients, you’ll achieve a shine that rivals commercial products.
The benefits extend beyond just aesthetics. DIY car wax is often more environmentally friendly and free from harsh chemicals. This means it’s safer for both you and the planet.
As you embark on this DIY journey, remember that practice makes perfect. With time, you’ll find techniques that work best for your vehicle’s surface.
Give it a try and enjoy the satisfaction of keeping your car looking its best with homemade care!